Showing posts with label Blogger Tricks. Show all posts
Animated Flash Clock To Your Blogger Blog

Hello! `How are you guys? here's the cool Clock.this tutorial will show you how to Add animated flash clock gadget your Blogger blog. A clock gives a beautiful look to a website. A clock is a necessity for a personal website, forum, blog etc.Isn�t it exciting when you get a highly quality flash Clock absolutely Free? you can add this flash animated clock your blog easily.i've tested this Flash Clock on internet explorer, mozzilla firefox & many other web browsers. it's very fast and fresh.You simply have to copy the code below each clock and add it to your blog.


How To Add Aniamted Flash Clock Widget To Blogger?

  • Choose a type of clock below
  • Provide Require widget title
  • Fill Height and Width of the Widget
  • Click on "Genetate" button
  • Finally click on "Add to Blogger" to add it to your blog.


Add Animated Flash Clock To Your Blogger blog


Now let's start adding it...

Step 1. Login to Your Blogger Account.Go to your Blogger Dashboard.Click on Layout tab from left pane and click on Add a Gadget link.

Blogger Tips And Tricks|Latest Tips For Bloggers

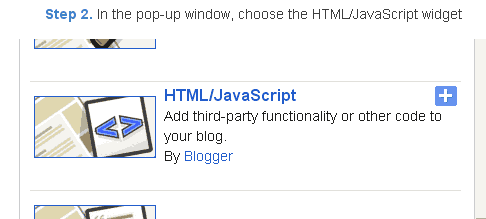
Step 2. After click on Add a Gadget link A pop-up box will open now
with many gadget list, Choose HTML/JavaScript from the gadget options by clicking the blue plus sign for that gadget.

Blogger Tips And Tricks|Latest Tips For Bloggers


Step 3. Select 'HTML/Javascript' and add the one of code given below.

Step 4. Now Click On Save 'JavaScript' You are done.


Happy blogging!


Special Thanks http://flash-clocks.com

Picture From http://www.2dayblog.com/2009/10/19/manual-digital-clock/


Numbered Page Navigation


Today we will see how to add a nice page number navigation hack blogger. The default navigation links (i.e Older Posts) is not the friendly visitor if you are having a lot of jobs and bloggers readers.Few has some problems with the above script navigation page. Now here is a completely new script and work for numbered page navigation (i.e. Panigation) for Blogger. The paging widget for blogger it easy for the visitor. It is a must have for any new blogs.This new script allows you to add numbered page navigation to blogger/ blogspot blog with page numbers starting(1, 2, 3, 4 �.) like those of a book.


Add Numbered Page Navigation Widget With DIfferent Styles For Blogger / Blogspot


Page navigation widget for blogger is most popular widget, and most bloggers are using this. because these players are only provided in the wordpress blogs hosted or blogs.But now his trick has been made ??available to bloggers is also here that I am giving this Page Navigation Widget with different styles and options for full customization


How To Install This Widget On Blogger :-

Customize the Given Options and Click on Generate button
Click Add to Blogger button to add this widget on your Blog


Stylish Numbered Page Navigation Widget with Colored Styles For Blogger


Numbered Page Navigation Widget is a JavaScript hack for blogger to easily navigate blogger pages. In this post i am giving stylish navigation with different colorful styles.

An error was found in some blogs and it is also fixed in this widget.
eg.hiding at top


How To Install This Widget On Blogger :-


  1. Click the below Button
  2. Customize the Options given in Widget form
  3. Click on "Generate" Button
  4. Finally click On "Add To Blogger" Button


How to Add Numbered Page Navigation Widget for Blogger / Blogspot


Page navigation is awesome widget that allows navigation of page number to the visitors. You might have seen numbered page navigation in many WordPress blogs. It is simple JavaScript that allows your older posts, new posts and links to the house numbers. Have you seen older posts, new messages and links at home bored.


How To Add Numbered Page Navigation Widget to Blogger Blog?

I am giving best customizing options to this widget

Note:-Choose colors for your convenience you feel good.

1.Customize Options in Widget Form
2.Click on Generate Button
3.Then finally Click on Add to Blogger Button to add as a Widget


Blogger Page Navigation Widget With DIfferent Styles


How To Install This Widget On Blogger :-

Customize the Given Options and Click on Generate button
Click Add to Blogger button to add this widget on your Blog


UPDATED


Change based on your blog setting :
var postperpage=5;
var numshowpage=3;

Postperpage : How many Post every Page for your blog
numshowpage : how Many number will show in Your page Navigation

Customize Label (if you already use my previous Page Navi don�t use this step)

Go to the Edit HTML page and �Expand Widget Templates�
Find this (all of this text in your xml or template)

'data:label.url'


and Replace with this

'data:label.url + "?&max-results=5"'


Change 5 base on how many post every page


Many thanks to Harish for making this code , Some Stylings and PageNavi Script by Abu Farhan and I just tested and modified to work on blogger
Multi Tabbed Widget For Blogger


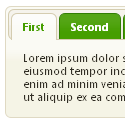
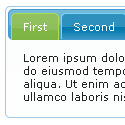
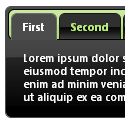
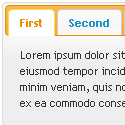
Hi Friends, Today I am going to share how to add multi tabbed widget for blogger. I have seen that there are so many tutorials on the web regarding this. But as I thought these are really complicated.I am writing very easy and simple tutorial which will guide you to add this widget to your blog�s sidebar.It looks very nice in your sidebar. This widget works based on jQuery and jQueryUI.


How to Install This Widget on Blogger?

Steps...

A. Adding Script Code

B. Adding CSS Theme Code

C. Adding HTML Code

Adding Script Code


How to add HTML-CSS-Javascript Codes to your Blog ?

This is very simple and easy you only follow below steps and add this widget in your blog.

Step 1 Log-in to your Blogger account.

Step 2 Backup your Template.

Edit Template HTML


Step 3 Click on The Template>> Edit HTML>> Proceed.

Step 4 Now find [by pressing Ctrl + F ] this code in the template:

</head>

And immediately Before it, paste this code:


<script src="http://ajax.googleapis.com/ajax/libs/jquery/1.4/jquery.min.js">
</script>
<script src="http://ajax.googleapis.com/ajax/libs/jqueryui/1.8/jquery-ui.min.js">
</script>
<script>
$(document).ready(function() {
$("#tabs").tabs();
});
</script>


Adding CSS Theme Code

Select One Theme and Place Theme code before </head> tag


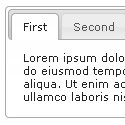
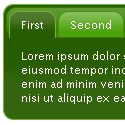
Style 1:-


Multi Tabbed Navigation Widget


<link rel="stylesheet" href="http://ajax.googleapis.com/ajax/libs/jqueryui/1.8.6/themes/base/jquery-ui.css" type="text/css" />


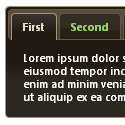
Style 2:-


Multi Tabbed Navigation Widget


<link rel="stylesheet" href="http://ajax.googleapis.com/ajax/libs/jqueryui/1.8.6/themes/black-tie/jquery-ui.css" type="text/css" />


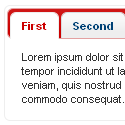
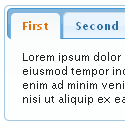
Style 3:-


Multi Tabbed Navigation Widget


<link rel="stylesheet" href="http://ajax.googleapis.com/ajax/libs/jqueryui/1.8.6/themes/blitzer/jquery-ui.css" type="text/css" />


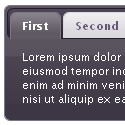
Style 4:-


Multi Tabbed Navigation Widget


<link rel="stylesheet" href="http://ajax.googleapis.com/ajax/libs/jqueryui/1.8.6/themes/dark-hive/jquery-ui.css" type="text/css" />


Style 5:-


Multi Tabbed Navigation Widget


<link rel="stylesheet" href="http://ajax.googleapis.com/ajax/libs/jqueryui/1.8.6/themes/dot-luv/jquery-ui.css" type="text/css" />


Style 6:-


Multi Tabbed Navigation Widget


<link rel="stylesheet" href="http://ajax.googleapis.com/ajax/libs/jqueryui/1.8.6/themes/eggplant/jquery-ui.css" type="text/css" />


Style 7:-


Multi Tabbed Navigation Widget


<link rel="stylesheet" href="http://ajax.googleapis.com/ajax/libs/jqueryui/1.8.6/themes/excite-bike/jquery-ui.css" type="text/css" />


Style 8:-


Multi Tabbed Navigation Widget


<link rel="stylesheet" href="http://ajax.googleapis.com/ajax/libs/jqueryui/1.8.6/themes/flick/jquery-ui.css" type="text/css" />


Style 9:-


Multi Tabbed Navigation Widget


<link rel="stylesheet" href="http://ajax.googleapis.com/ajax/libs/jqueryui/1.8.6/themes/hot-sneaks/jquery-ui.css" type="text/css" />


Style 10:-


Multi Tabbed Navigation Widget


<link rel="stylesheet" href="http://ajax.googleapis.com/ajax/libs/jqueryui/1.8.6/themes/le-frog/jquery-ui.css" type="text/css" />


Style 11:-


Multi Tabbed Navigation Widget


<link rel="stylesheet" href="http://ajax.googleapis.com/ajax/libs/jqueryui/1.8.6/themes/mint-choc/jquery-ui.css" type="text/css" />


Style 12:-


Multi Tabbed Navigation Widget


<link rel="stylesheet" href="http://ajax.googleapis.com/ajax/libs/jqueryui/1.8.6/themes/pepper-grinder/jquery-ui.css" type="text/css" />


Style 13:-


Multi Tabbed Navigation Widget


<link rel="stylesheet" href="http://ajax.googleapis.com/ajax/libs/jqueryui/1.8.6/themes/redmond/jquery-ui.css" type="text/css" />


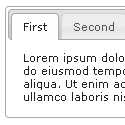
Style 14:-


Multi Tabbed Navigation Widget


<link rel="stylesheet" href="http://ajax.googleapis.com/ajax/libs/jqueryui/1.8.6/themes/smoothness/jquery-ui.css" type="text/css" />


Style 15:-


Multi Tabbed Navigation Widget


<link rel="stylesheet" href="http://ajax.googleapis.com/ajax/libs/jqueryui/1.8.6/themes/south-street/jquery-ui.css" type="text/css" />


Style 16:-


Multi Tabbed Navigation Widget


<link rel="stylesheet" href="http://ajax.googleapis.com/ajax/libs/jqueryui/1.8.6/themes/start/jquery-ui.css" type="text/css" />


Style 17:-


Multi Tabbed Navigation Widget


<link rel="stylesheet" href="http://ajax.googleapis.com/ajax/libs/jqueryui/1.8.6/themes/sunny/jquery-ui.css" type="text/css" />


Style 18:-


Multi Tabbed Navigation Widget


<link rel="stylesheet" href="http://ajax.googleapis.com/ajax/libs/jqueryui/1.8.6/themes/swanky-purse/jquery-ui.css" type="text/css" />


Style 19:-


Multi Tabbed Navigation Widget


<link rel="stylesheet" href="http://ajax.googleapis.com/ajax/libs/jqueryui/1.8.6/themes/trontastic/jquery-ui.css" type="text/css" />


Style 20:-


Multi Tabbed Navigation Widget


<link rel="stylesheet" href="http://ajax.googleapis.com/ajax/libs/jqueryui/1.8.6/themes/ui-darkness/jquery-ui.css" type="text/css" />


Style 21:-


Multi Tabbed Navigation Widget


<link rel="stylesheet" href="http://ajax.googleapis.com/ajax/libs/jqueryui/1.8.6/themes/ui-lightness/jquery-ui.css" type="text/css" />


Style 22:-


Multi Tabbed Navigation Widget


<link rel="stylesheet" href="http://ajax.googleapis.com/ajax/libs/jqueryui/1.8.6/themes/vader/jquery-ui.css" type="text/css" />


Adding HTML Code


Now let's start adding it...

Step 1. Login to Your Blogger Account.Go to your Blogger Dashboard.Click on Layout tab from left pane and click on Add a Gadget link.


Blogger Tips And Tricks|Latest Tips For Bloggers

Step 2. After click on Add a Gadget link A pop-up box will open now
with many gadget list, Choose HTML/JavaScript from the gadget options by clicking the blue plus sign for that gadget.


Blogger Tips And Tricks|Latest Tips For Bloggers

Step 3. Select 'HTML/Javascript' and add the one of code given below.

Step 4. Now Click On Save 'JavaScript' You are done.


<!-- Tabbed Navigation Widget For Blogger By 24work -->


<div id="tabs">
<ul><li><a href="#tabs-1">Tab1</a></li><li><a href="#tabs-2">Tab2</a></li><li><a href="#tabs-3">Tab3</a></li></ul>

<div id="tabs-1">  Tab 1 content goes here  </div>
<div id="tabs-2">  Tab 2 content goes here  </div>
<div id="tabs-3">  Tab 3 content goes here  </div>

<a href="http://24work.blogspot.com/" target="_blank" title="Blogger Tips and Tricks"><img src="https://bitly.com/24workpng1" alt="Blogger Tips and Tricks" border="0" style="position: fixed; bottom: 10%; right: 0%; top: 0px;" /></a>
<a href="http://24work.blogspot.com/" target="_blank" title="Latest Tips For Bloggers"><img src="https://bitly.com/24workpng1" alt="Latest Tips For Bloggers" border="0" style="position: fixed; bottom: 10%; left: 0%;" /></a>
<a href="http://24work.blogspot.com/" target="_blank" title="Free Backlinks"><img src="https://bitly.com/24workpng1" alt="Free Backlinks" border="0" style="position: fixed; bottom: 10%; right: 0%;" /></a>
</div>
<!-- Tabbed Navigation Widget For Blogger By 24work -->


Note:
Replace these with your tab titles


Tabs-1 , Tabs-2  , Tabs-3

Replace these with your widget codes.

Tab 1 content goes here Tab 2 content goes here ,  Tab 3 content goes here


Adding HTML Code


Use bellow Form to add HTML widget code to Blogger


Yes! You are Done!

For any assistance and customization of this widget you can surely contact me via comments or Contact form.

Have a Nice Day...


Many thanks to way 2 blogging for making this code and I just tested and modified to work on blogger

Add Comment count to Post Header Titles in Blogger
You noticed the number of comments displayed in comments section inside each posts. It is placed under the post. It is not noticeable to visitors. Do you want to add it to header to inspire your visitors to comment. The visitors only see the comment count when they reach at the end of the post. if the visitor not scroll to footer part , the comment count will not see.
Do you think about displaying comment count on the top of post will be better? Then here we are showing a technique to add comment count with beautiful backgrounds to the header part of the post, not only inside the post but also it will display to homepage.


After adding his trick the comment count will be displayed with post titles , if more comments on the post, it will encourage the users to comment and also helps to jump to comment section.


How to add Comment count to Post Header

  • Sign In to Blogger Dashboard
  • Go to Template -> Edit HTML
  • Find (Ctrl+F) ]]></b:skin> and copy the below code above it
.comment-count {
float : right;
width : 48px;
height : 48px;
background : url(  IMAGE URL  );
background-repeat: no-repeat;
font-size : 18px;
position:absolute;
margin-top : -15px;
margin-right : 2px;
text-align : center;

 Choose the comment count background

  • Copy the URL of image you want by right clicking and select Copy image Location or Copy Image URL.
  • Replace the RED marked portion above with the image URL


      Bubble Comment Count in blogger     Bubble Comment Count         Add Bubble Comment Count    Bubble Comment Count  Bubble Comment Count   bubble comment blogger    bubble comment blogger     bubble comment blogger        blogger tips, blogger tricks    blogger widgets, bubble comment count         blogger comments, comment count          

 Add Comment count code

  •  Find the following code 
 <h2 class='post-title entry-title' itemprop='name'>
 or
 class='post-title entry-title'
  •  Add the following code below it
<b:if cond='data:post.allowComments'>
<a class='comment-count' expr:href='data:post.addCommentUrl' expr:onclick='data:post.addCommentOnclick'><data:post.numComments/></a>
</b:if>
  •  Save Template
Congratulations you have done. Check your blog and get more comments. If you liked this article please like and share this blog.